Autosorting
Choose a profile and box, then copy its filters to your conveyors. Connections and materials are below.
Autosorting setup

Find an item and its box
Item catalogue 1260
Select an item to open its box settings.
Save or open an autosorting setup
Save this setup to continue later. No sign-in needed.
My setups and JSON import · 0/20
Saves your profile, box options, return lines and selected group or item. This record does not change any in-game filters.
No saved setups yet.
Complete system assemblyAll boxes, connections, power, materials and downloads
Full instructions · Solo · 1 player
A specific layout for the current filters. Build normal input first; returns can be enabled later. DLC changes box appearance, not filters or equipment quantities.
Adding returns changes pipes, power and the set of splitters and combiners. If the input system is already built, use the change list below.
Upgrading the old layout: one input conveyor per storage group
Components, medicine and food now each use one input conveyor with a combined Any filter. With the OUT return line, each of these groups needs two conveyors.
- Turn sorting off while changing the setup.
- Copy the combined filters into IN-COMPS, IN-MEDS and IN-FOOD. Select Any on each conveyor.
- Remove RES-COMPS, RES-MEDS and RES-FOOD. These three groups are now fed only from the Item sorting buffer.
- Paste the new filter into S05 and select None instead of Any. JSON does not change the mode. This step keeps materials from taking two different routes.
- Reconnect pipes and power using the updated complete instructions: redundant conveyors and combiners have been removed, and splitters and combiners have been renumbered.
These three groups keep their OUT return lines. Other groups may still need extra FIX lines to return misplaced raiding items and armour.
Open step-by-step assemblyAdd returns to my existing system
Disconnect the sorting system's power output before starting. Remove the listed old connections first, then relabel devices and add the new ones.
Comparison: the same profile and box style, forward sorting → sorting with returns. Boxes and adaptors stay in place.
Old label → new label · 0
These are the same physical devices with new numbers. Do not move a combiner just because its number changed.
New devices · 18
- Remove non-matching items · OUT-BOOMIndustrial Conveyor
- Remove non-matching items · OUT-ARMORIndustrial Conveyor
- Remove non-matching items · OUT-GUNSIndustrial Conveyor
- Return misplaced raid items and armour · FIX-GUNS-1Industrial Conveyor
- Return misplaced raid items and armour · FIX-GUNS-2Industrial Conveyor
- Remove non-matching items · OUT-TOOLSIndustrial Conveyor
- Return misplaced raid items and armour · FIX-TOOLSIndustrial Conveyor
- Remove non-matching items · OUT-COMPSIndustrial Conveyor
- Remove non-matching items · OUT-MEDSIndustrial Conveyor
- Remove non-matching items · OUT-FOODIndustrial Conveyor
- Remove non-matching items · OUT-OREIndustrial Conveyor
- Combine into: Loot intake · К1Industrial Combiner
- Combine into: Loot intake · К2Industrial Combiner
- Combine into: Loot intake · К3Industrial Combiner
- Combine into: Loot intake · К4Industrial Combiner
- Combine into: Loot intake · К5Industrial Combiner
- Split from: Weapons, ammo and clothing · Р6Industrial Splitter
- Split from: Tools and building · Р7Industrial Splitter


Remove pipes · old labels · 0
No changes.
Add pipes · new labels · 29
- Combine into: Loot intake · К1
Industrial OutAdapter 1: Box 1 · Loot intake · 1/1Industrial In - Remove non-matching items · OUT-BOOM
Industrial OutputCombine into: Loot intake · К1Industrial In 1 - Remove non-matching items · OUT-ARMOR
Industrial OutputCombine into: Loot intake · К1Industrial In 2 - Combine into: Loot intake · К2
Industrial OutCombine into: Loot intake · К1Industrial In 3 - Remove non-matching items · OUT-GUNS
Industrial OutputCombine into: Loot intake · К2Industrial In 1 - Return misplaced raid items and armour · FIX-GUNS-1
Industrial OutputCombine into: Loot intake · К2Industrial In 2 - Combine into: Loot intake · К3
Industrial OutCombine into: Loot intake · К2Industrial In 3 - Return misplaced raid items and armour · FIX-GUNS-2
Industrial OutputCombine into: Loot intake · К3Industrial In 1 - Remove non-matching items · OUT-TOOLS
Industrial OutputCombine into: Loot intake · К3Industrial In 2 - Combine into: Loot intake · К4
Industrial OutCombine into: Loot intake · К3Industrial In 3 - Return misplaced raid items and armour · FIX-TOOLS
Industrial OutputCombine into: Loot intake · К4Industrial In 1 - Remove non-matching items · OUT-COMPS
Industrial OutputCombine into: Loot intake · К4Industrial In 2 - Combine into: Loot intake · К5
Industrial OutCombine into: Loot intake · К4Industrial In 3 - Remove non-matching items · OUT-MEDS
Industrial OutputCombine into: Loot intake · К5Industrial In 1 - Remove non-matching items · OUT-FOOD
Industrial OutputCombine into: Loot intake · К5Industrial In 2 - Remove non-matching items · OUT-ORE
Industrial OutputCombine into: Loot intake · К5Industrial In 3 - Adapter 5: Box 5 · Raid & traps · 1/1
Industrial OutRemove non-matching items · OUT-BOOMIndustrial Input - Adapter 6: Box 6 · Combat kits · 1/1
Industrial OutRemove non-matching items · OUT-ARMORIndustrial Input - Adapter 7: Box 7 · Weapons, ammo and clothing · 1/1
Industrial OutSplit from: Weapons, ammo and clothing · Р6Industrial In - Split from: Weapons, ammo and clothing · Р6
Industrial Out 1Remove non-matching items · OUT-GUNSIndustrial Input - Split from: Weapons, ammo and clothing · Р6
Industrial Out 2Return misplaced raid items and armour · FIX-GUNS-1Industrial Input - Split from: Weapons, ammo and clothing · Р6
Industrial Out 3Return misplaced raid items and armour · FIX-GUNS-2Industrial Input - Adapter 8: Box 8 · Tools and building · 1/1
Industrial OutSplit from: Tools and building · Р7Industrial In - Split from: Tools and building · Р7
Industrial Out 1Remove non-matching items · OUT-TOOLSIndustrial Input - Split from: Tools and building · Р7
Industrial Out 2Return misplaced raid items and armour · FIX-TOOLSIndustrial Input - Adapter 9: Box 9 · Components · 1/1
Industrial OutRemove non-matching items · OUT-COMPSIndustrial Input - Adapter 10: Box 10 · Medical supplies and materials · 1/1
Industrial OutRemove non-matching items · OUT-MEDSIndustrial Input - Adapter 11: Box 11 · Food and farming · 1/1
Industrial OutRemove non-matching items · OUT-FOODIndustrial Input - Adapter 12: Box 12 · Main resources · 1/1
Industrial OutRemove non-matching items · OUT-OREIndustrial Input
Remove wires · old labels · 0
No changes.
Add wires · new labels · 11
- Fill: Main resources · RES-ORE
PassthroughRemove non-matching items · OUT-BOOMPower In - Remove non-matching items · OUT-BOOM
PassthroughRemove non-matching items · OUT-ARMORPower In - Remove non-matching items · OUT-ARMOR
PassthroughRemove non-matching items · OUT-GUNSPower In - Remove non-matching items · OUT-GUNS
PassthroughReturn misplaced raid items and armour · FIX-GUNS-1Power In - Return misplaced raid items and armour · FIX-GUNS-1
PassthroughReturn misplaced raid items and armour · FIX-GUNS-2Power In - Return misplaced raid items and armour · FIX-GUNS-2
PassthroughRemove non-matching items · OUT-TOOLSPower In - Remove non-matching items · OUT-TOOLS
PassthroughReturn misplaced raid items and armour · FIX-TOOLSPower In - Return misplaced raid items and armour · FIX-TOOLS
PassthroughRemove non-matching items · OUT-COMPSPower In - Remove non-matching items · OUT-COMPS
PassthroughRemove non-matching items · OUT-MEDSPower In - Remove non-matching items · OUT-MEDS
PassthroughRemove non-matching items · OUT-FOODPower In - Remove non-matching items · OUT-FOOD
PassthroughRemove non-matching items · OUT-OREPower In
Keep the other connections. Get the new conveyor filters from the full guide with returns enabled. Check all used ports and modes before reconnecting power. We have not tested this layout in the game yet.
Code checks the connections and filters. We have not tested the entire network in the game. The main kit uses a separate battery. Step 4 explains charging or connecting to base power. Runtime and transfer speed are not calculated.
1. Equipment and placement


Each box gets one adaptor. Place the intake and three intermediate boxes close together; place storage groups in the zones listed for the rows below. Put splitters near the source box outlet and combiners near the destination inlet. Keep lids, adaptors and pipe routes accessible.
Number each row's boxes from left to right, facing the lids. Each adaptor takes its box's number. Incoming lines connect to the first adaptor; its Industrial Out connects to the next adaptor's Industrial In. Extraction and returns connect to the last adaptor's output. Do not join different groups into one row. Strict first-then-second filling is not guaranteed.
Row 1 · Loot intake (DROP)
Near the loot input · 1 pcs
- Box 1 · Loot intake · 1/1Large Wood Box · adaptor 1 on this box
Row 2 · Armour selection (B1 — AFTER BOOM)
Near the loot input · 1 pcs
- Box 2 · Armour selection · 1/1Large Wood Box · adaptor 2 on this box
Row 3 · Item sorting (B2 — MAIN)
Near the loot input · 1 pcs
- Box 3 · Item sorting · 1/1Large Wood Box · adaptor 3 on this box
Row 4 · Resource sorting (B3 — RESOURCES / RARE)
Near the loot input · 1 pcs
- Box 4 · Resource sorting · 1/1Large Wood Box · adaptor 4 on this box
Row 5 · Raid & traps (BOOM)
Deep inside protected storage · 1 pcs
- Box 5 · Raid & traps · 1/1Explosives Storage Box · adaptor 5 on this box
Row 6 · Combat kits (ARMOR)
Equipment area · 1 pcs
- Box 6 · Combat kits · 1/1Armor Storage Box · adaptor 6 on this box
Row 7 · Weapons, ammo and clothing (GUNS)
Equipment area · 1 pcs
- Box 7 · Weapons, ammo and clothing · 1/1Guns Storage Box · adaptor 7 on this box
Row 8 · Tools and building (TOOLS)
By the workbench · 1 pcs
- Box 8 · Tools and building · 1/1Tools Storage Box · adaptor 8 on this box
Row 9 · Components (COMPS)
By the workbench · 1 pcs
- Box 9 · Components · 1/1Comps Storage Box · adaptor 9 on this box
Row 10 · Medical supplies and materials (MEDS)
By the workbench · 1 pcs
- Box 10 · Medical supplies and materials · 1/1Meds Storage Box · adaptor 10 on this box
Row 11 · Food and farming (FOOD)
Equipment area · 1 pcs
- Box 11 · Food and farming · 1/1Food Storage Box · adaptor 11 on this box
Row 12 · Main resources (ORE)
Near smelting · 1 pcs
- Box 12 · Main resources · 1/1Ore Storage Box · adaptor 12 on this box


Crafting counts 12 regular Large Wood Boxes. Choose Storage Box Pack appearances from the layout above; they are not additional recipes and do not double the box count.
Calculate materialsEnter finished equipment and raw materials in the calculator's stock. Nothing is deducted from other plans here.
2. Lay the pipes · 27 connections
Each row is one pipe. “Р” means splitter and “К” means combiner; numbers identify physical devices. An Industrial Splitter cannot be replaced with an electrical splitter. Do not join unused ports.
- 1Adapter 1: Box 1 · Loot intake · 1/1
Industrial OutSplit from: Loot intake · Р1Industrial In - 2Split from: Loot intake · Р1
Industrial Out 1Send raid items · S01Industrial Input - 3Split from: Loot intake · Р1
Industrial Out 2Send the rest to armour selection · S02Industrial Input - 4Adapter 2: Box 2 · Armour selection · 1/1
Industrial OutSplit from: Armour selection · Р2Industrial In - 5Split from: Armour selection · Р2
Industrial Out 1Send combat armour · S03Industrial Input - 6Split from: Armour selection · Р2
Industrial Out 2Send remaining items · S04Industrial Input - 7Send the rest to armour selection · S02
Industrial OutputAdapter 2: Box 2 · Armour selection · 1/1Industrial In - 8Adapter 3: Box 3 · Item sorting · 1/1
Industrial OutSplit from: Item sorting · Р3Industrial In - 9Split from: Item sorting · Р3
Industrial Out 1Send remaining resources for sorting · S05Industrial Input - 10Split from: Item sorting · Р3
Industrial Out 2Fill: Weapons, ammo and clothing · IN-GUNSIndustrial Input - 11Split from: Item sorting · Р3
Industrial Out 3Split from: Item sorting · Р4Industrial In - 12Split from: Item sorting · Р4
Industrial Out 1Fill: Tools and building · IN-TOOLSIndustrial Input - 13Split from: Item sorting · Р4
Industrial Out 2Fill: Components · IN-COMPSIndustrial Input - 14Split from: Item sorting · Р4
Industrial Out 3Split from: Item sorting · Р5Industrial In - 15Split from: Item sorting · Р5
Industrial Out 1Fill: Medical supplies and materials · IN-MEDSIndustrial Input - 16Split from: Item sorting · Р5
Industrial Out 2Fill: Food and farming · IN-FOODIndustrial Input - 17Send remaining items · S04
Industrial OutputAdapter 3: Box 3 · Item sorting · 1/1Industrial In - 18Adapter 4: Box 4 · Resource sorting · 1/1
Industrial OutFill: Main resources · RES-OREIndustrial Input - 19Send remaining resources for sorting · S05
Industrial OutputAdapter 4: Box 4 · Resource sorting · 1/1Industrial In - 20Send raid items · S01
Industrial OutputAdapter 5: Box 5 · Raid & traps · 1/1Industrial In - 21Send combat armour · S03
Industrial OutputAdapter 6: Box 6 · Combat kits · 1/1Industrial In - 22Fill: Weapons, ammo and clothing · IN-GUNS
Industrial OutputAdapter 7: Box 7 · Weapons, ammo and clothing · 1/1Industrial In - 23Fill: Tools and building · IN-TOOLS
Industrial OutputAdapter 8: Box 8 · Tools and building · 1/1Industrial In - 24Fill: Components · IN-COMPS
Industrial OutputAdapter 9: Box 9 · Components · 1/1Industrial In - 25Fill: Medical supplies and materials · IN-MEDS
Industrial OutputAdapter 10: Box 10 · Medical supplies and materials · 1/1Industrial In - 26Fill: Food and farming · IN-FOOD
Industrial OutputAdapter 11: Box 11 · Food and farming · 1/1Industrial In - 27Fill: Main resources · RES-ORE
Industrial OutputAdapter 12: Box 12 · Main resources · 1/1Industrial In
3. Configure all conveyors · 11 filters
Each conveyor has its own ID. Copy its filter, paste it in game and manually select the specified mode. Any passes matching items; None passes everything except the list. Place S01 and S03 once each.
Where to paste the filter in Rust
- Find your conveyor ID on the website and click Copy filter. This copies one JSON filter, not the whole guide.
- In Rust, open the required conveyor's menu. Hold Shift and click Paste — holding Shift makes the game read JSON from the clipboard.
- Compare the list with the card and select Any or None separately. Button names may differ with the game language.
- Switch on the conveyor and test it with one matching item. Mark it as configured after setting its filter and mode in the game.
If copying is unavailable, select the JSON in the manual copy field. Do not paste the entire guide file into a conveyor.
Weapon, armour and backpack skins are covered by their base item in the JSON. Redundant entries have been removed; the filter keeps the same purpose.
If the list did not change, open F1 and check the warning after pasting. Its text can identify an item or setting rejected by the game.
Facepunch · JSON Copy / PasteThe buttons and fields below provide JSON for the game. Base-item filters cover their variants, so fewer separate skin entries may appear.
Loot intake → Raid & traps
Mode: Any · In game: 21 entriesShow JSON for manual copying
Loot intake → Armour selection
Mode: None · In game: 21 entriesShow JSON for manual copying
Armour selection → Combat kits
Mode: Any · In game: 18 entriesShow JSON for manual copying
Armour selection → Item sorting
Mode: None · In game: 18 entriesShow JSON for manual copying
Item sorting → Resource sorting
Mode: None · In game: 28 entriesShow JSON for manual copying
Item sorting → Weapons, ammo and clothing
Mode: Any · In game: 3 entriesShow JSON for manual copying
Item sorting → Tools and building
Mode: Any · In game: 5 entriesShow JSON for manual copying
Item sorting → Components
Mode: Any · In game: 6 entriesShow JSON for manual copying
Item sorting → Medical supplies and materials
Mode: Any · In game: 6 entriesShow JSON for manual copying
Item sorting → Food and farming
Mode: Any · In game: 7 entriesShow JSON for manual copying
Resource sorting → Main resources
Mode: Any · In game: 19 entriesShow JSON for manual copying
4. Connect power · 11 wires
Configure and turn on the conveyors first. Connect wires through Passthrough in the listed order, then connect the charged Medium Rechargeable Battery last. The conveyors total 11 rW at the reference consumption of 1 rW each; the selected source has a nominal 50 rW output.
One sequential chain of 11 conveyors. Check power at the last device of each chain.
My base already has spare power
You can use a dedicated output from your existing power network instead of a new battery. Before connecting it, turn off sorting and remove the old wire from the indicated input.
The dedicated output needs at least 11 rW.
Power InThis replaces only the first wire from the battery. Keep the other wires as listed below. Rooftop generation is not the same as spare power here: check this point with the wire tool, including at night.
Materials without a new batteryThis separate list excludes the battery. The page's main kit and saved layout still include it.
How to charge a separate battery before testing
Add one Large Solar Panel and one wire connection to the main kit. This charges the battery for a test; it does not provide a complete day-and-night warehouse power supply.
- Disconnect the battery's Power Output from the sorting system for the initial charge. Keep the battery in a protected part of the base.
- Place the solar panel where sunlight can reach it, without a roof blocking it. Check its actual output in the game; it depends on light and angle.
- Large Solar Panel
Electric OutputMedium Rechargeable BatteryPower In - Let the battery charge and check the stored charge in its interface. After setting up the pipes and filters, connect Power Output to the first device listed below.
The panel produces up to 20 rW, and battery charging is up to 80% efficient. Charge may fall under load even during the day. Runtime, overnight reserves and continuous power for the whole base are not calculated here.
Materials for the layout and one solar panelReference ports and ratings checked on 9 September 2026: Solar panel · Medium battery. These connections follow reference documentation; this layout has not been tested in the game yet.
Filter Pass and Filter Fail are unused in this circuit. Adaptors stay unpowered: item transfer does not require electricity. Sorting slots within a box is a separate feature.
- 1Charged Medium Rechargeable Battery
Power OutputSend raid items · S01Power In - 2Send raid items · S01
PassthroughSend the rest to armour selection · S02Power In - 3Send the rest to armour selection · S02
PassthroughSend combat armour · S03Power In - 4Send combat armour · S03
PassthroughSend remaining items · S04Power In - 5Send remaining items · S04
PassthroughSend remaining resources for sorting · S05Power In - 6Send remaining resources for sorting · S05
PassthroughFill: Weapons, ammo and clothing · IN-GUNSPower In - 7Fill: Weapons, ammo and clothing · IN-GUNS
PassthroughFill: Tools and building · IN-TOOLSPower In - 8Fill: Tools and building · IN-TOOLS
PassthroughFill: Components · IN-COMPSPower In - 9Fill: Components · IN-COMPS
PassthroughFill: Medical supplies and materials · IN-MEDSPower In - 10Fill: Medical supplies and materials · IN-MEDS
PassthroughFill: Food and farming · IN-FOODPower In - 11Fill: Food and farming · IN-FOOD
PassthroughFill: Main resources · RES-OREPower In
Leave the last conveyor's Passthrough free in each chain. Add no other consumers to these chains. Enabling returns changes equipment and wiring order: rebuild power according to the new list.
5. Check with test items
Start with empty boxes and three items in Loot intake. This is the catalogue's expected result, which still needs testing in game:
- Rocket Raid & traps
- Cloth Medical supplies and materials
- Metal Fragments Main resources
 Rocket Raid & traps
 Cloth Medical supplies and materials
 Metal Fragments Main resources
Without returns, misplaced items stay in their box: return them to intake manually. If items do not move, check power at the last conveyor in each chain, each device's switch, mode, filter, pipe direction and available space. A full box does not guarantee a bypass.
If sorting does not workOne check at a time, with ports and the selected line’s filter
The conveyor does not transfer items
Marks are made by the user. The site does not check the game state.
Matches: 0 of 5. Mismatches: 0. Not checked: 0.
Conveyor power and on/off state
Check the power source charge, conveyor state and every wire in its chain. Start at the battery and follow the chain to the selected device.
The selected conveyor has power at Power In and is switched on. Filter Pass and Filter Fail do not replace Passthrough.
Show exact connections: 1
- Charged Medium Rechargeable Battery
Power OutputSend raid items · S01Power In
Note and report download
Routing catalogue: Staging 05 Sep 2026; ports: Facepunch snapshot 06 Sep 2026; RUSTICK wiring. In-game acceptance is pending.
Checks reset after reloading or choosing another layout, line or problem. Download the report to keep them. Collapsing the panel and changing the language keep your checks.
JSON before game-paste preparation
The file contains the current routing settings before game-paste preparation. To paste into the game, use the filter buttons or the main instructions.
Routing catalogue: Staging 05 Sep 2026; items: build 25129251; ports: Facepunch snapshot 06 Sep 2026; row rules checked 08 Sep 2026. Conveyor ports · Network size/depth limit — 32 · Distribution along a row. Total box count is not the reach of a single conveyor; intermediate conveyors separate routes. Code checks of ports do not prove whole-network reach or speed on a server. Route pipes through openings.
Box placement and item flow
One box for loot. Sorting handles the rest.
Put your loot in Loot intake. Conveyors distribute it into the boxes below. Intermediate boxes let the system separate items.
How items movePurpose of each box
Arrows show item routes through filters. They do not mean directly connecting all boxes with one pipe.
- INPUT BOX · 1 pc
Loot intake
Place loot in this box. One line takes raid items; the other sends the rest to armour selection.
Everything else → Armour selection - INTERMEDIATE BOX · 1 pc
Armour selection
Combat armour is selected here. Other items go to item sorting.
Everything else → Item sorting - INTERMEDIATE BOX · 1 pc
Item sorting
Components, medicine and food leave here together with their materials. Remaining resources go to the Resource sorting buffer; unmatched items stay here.
Where items go from here · 5
Remaining resources → Resource sorting - INTERMEDIATE BOX · 1 pc
Resource sorting
Resources split into their storage groups. Items matching no filter stay here without automatic deletion.
Where items go from here · 1
If no filter matches an item, it stays in Item sorting or Resource sorting. Check leftovers manually; the system discards nothing.
Names in the previous layout
- СБРОС → Loot intake
- Б1 — ПОСЛЕ BOOM → Armour selection
- Б2 — ОСНОВНОЙ → Item sorting
- Б3 — РЕСУРСЫ / РЕДКОЕ → Resource sorting
“After BOOM” meant after extracting raid items, not after an explosion. Choose your own labels: filters determine sorting.
What to place and how manyBoxes: 12 · sorting conveyors: 11
8 groups × 1 + 1 intake + 3 intermediate = 12 pcs All four sorting-stage boxes are already included. Of these, 8 use Storage Box Pack appearances and 4 are regular.
Storage boxes
- Raid & trapsExplosives Storage BoxGroup label: BOOM×1
- Combat kitsArmor Storage BoxGroup label: ARMOR×1
- Weapons, ammo and clothingGuns Storage BoxGroup label: GUNS×1
- Tools and buildingTools Storage BoxGroup label: TOOLS×1
- ComponentsComps Storage BoxGroup label: COMPS×1
- Medical supplies and materialsMeds Storage BoxGroup label: MEDS×1
- Food and farmingFood Storage BoxGroup label: FOOD×1
- Main resourcesOre Storage BoxGroup label: ORE×1
Sorting-stage boxes
- DROPLarge Wood Box×1
- B1 — AFTER BOOMLarge Wood Box×1
- B2 — MAINLarge Wood Box×1
- B3 — RESOURCES / RARELarge Wood Box×1
For moving items
- One adaptor per boxFor pipe connections; this setup uses one per box.×12
- Sorting conveyorsEach input configuration is a separate conveyor.×11
- Return misplaced items · optionalAn additional 11; total with returns — 22.+11
You also need a Pipe Tool, Wire Tool and conveyor power. Splitters send one output into several lines; combiners merge several lines into one input. Exact quantities, rows and every connection are in the selected profile's full instructions below.
This build assigns one box to each group.
This is the selected profile's basic layout, without capacity calculations for your loot volume. Box appearances — Facepunch.
Box placementPlace items near where you use them
Place intake inside the protected part of your base, between the entrance and storage. Keep the three intermediate boxes nearby, with accessible lids and adaptors. Group the remaining boxes by nearby activities.
By the workbench3 pcs
Keep crafting materials close. Cloth and Leather are stored with medical items.
Near smelting1 pcs
A convenient place for ore and fuel. Take raw materials out, then return smelted results to intake.
Equipment area3 pcs
Keep weapons, protection and supplies together to gear up in one place.
Deep inside protected storage1 pcs
Keep raid items away from the outer entrance. A storage group does not need to stand beside intake.
This suggests box placement, not a base blueprint or pipe order. Solo keeps metal in the general resource group; Duo keeps refined metal and ore together. This sorting setup does not configure automatic smelting or crafting.
Rust Staging catalogue · 2026-09-05 · Rules are checked in code. The build in game and current Stable still need testing.
Connect sorting
Start with one line
For the first test, use two boxes — Loot intake and Raid & traps — two adaptors and one conveyor. Configure S01, verify an item transfers, then add the other lines.
Connect the pipes
Place an adaptor on each box. Use the Pipe Tool to connect ports along the arrows above. The conveyor's item outlet is Industrial Output; Filter Pass and Filter Fail carry electrical signals.
Paste the filter and select its mode
Copy the filter and paste it into the correct conveyor with Shift + Paste. Set the mode shown on the card separately: Any allows the list, None excludes it. S01 needs Any, S05 needs None. Check the list in-game after pasting.
Supply power and test
Connect electricity to the conveyor's Power In and turn it on. Put a Rocket and Cloth in intake: S01 transfers the Rocket and leaves the Cloth. The adaptor does not need power just to transfer items.
Adding other branches and box rows
One box → several destinations
Place an Industrial Splitter after its adaptor. It has three outputs, each feeding a conveyor with its own filter; add splitters for more branches. For example, S01 extracts raid items and S02 passes the rest to Armour extraction. The splitter itself does not select categories.
Several lines → one box
An Industrial Combiner has three inputs and one output. Connect conveyor outputs to it, then connect it to the destination adaptor. This lets medical storage receive medicine from Item sorting and Cloth from Resource sorting.
Two or three boxes in one group
Connect the conveyor output to the first box adaptor's input, then that adaptor's output to the next input. This is one row with a shared purpose. Do not mix categories this way. Keep adaptors accessible and wire returns separately.
What None means
This line excludes listed items and passes everything else. Another conveyor on the same box may extract an item using its own filter. S02, S04 and OUT returns work this way. The original catalogue calls this mode Exclude. Pasting a filter does not automatically switch the mode.
Next configure the five intake/sorting lines, then the remaining group lines. The same ID always means the same conveyor: do not place S01 or S03 twice. Returns for misplaced items can be added later. If transfer stops, check destination space, power, switches, pipe direction and filters. A full raid box does not send Rockets around via S02.
Routes are checked in code; we have not tested the whole build in the current Stable game. Pipes and devices — Facepunch · Filter modes · Conveyor recipe.
Order inside a boxAdaptor · 1 rW · custom snapshot layout
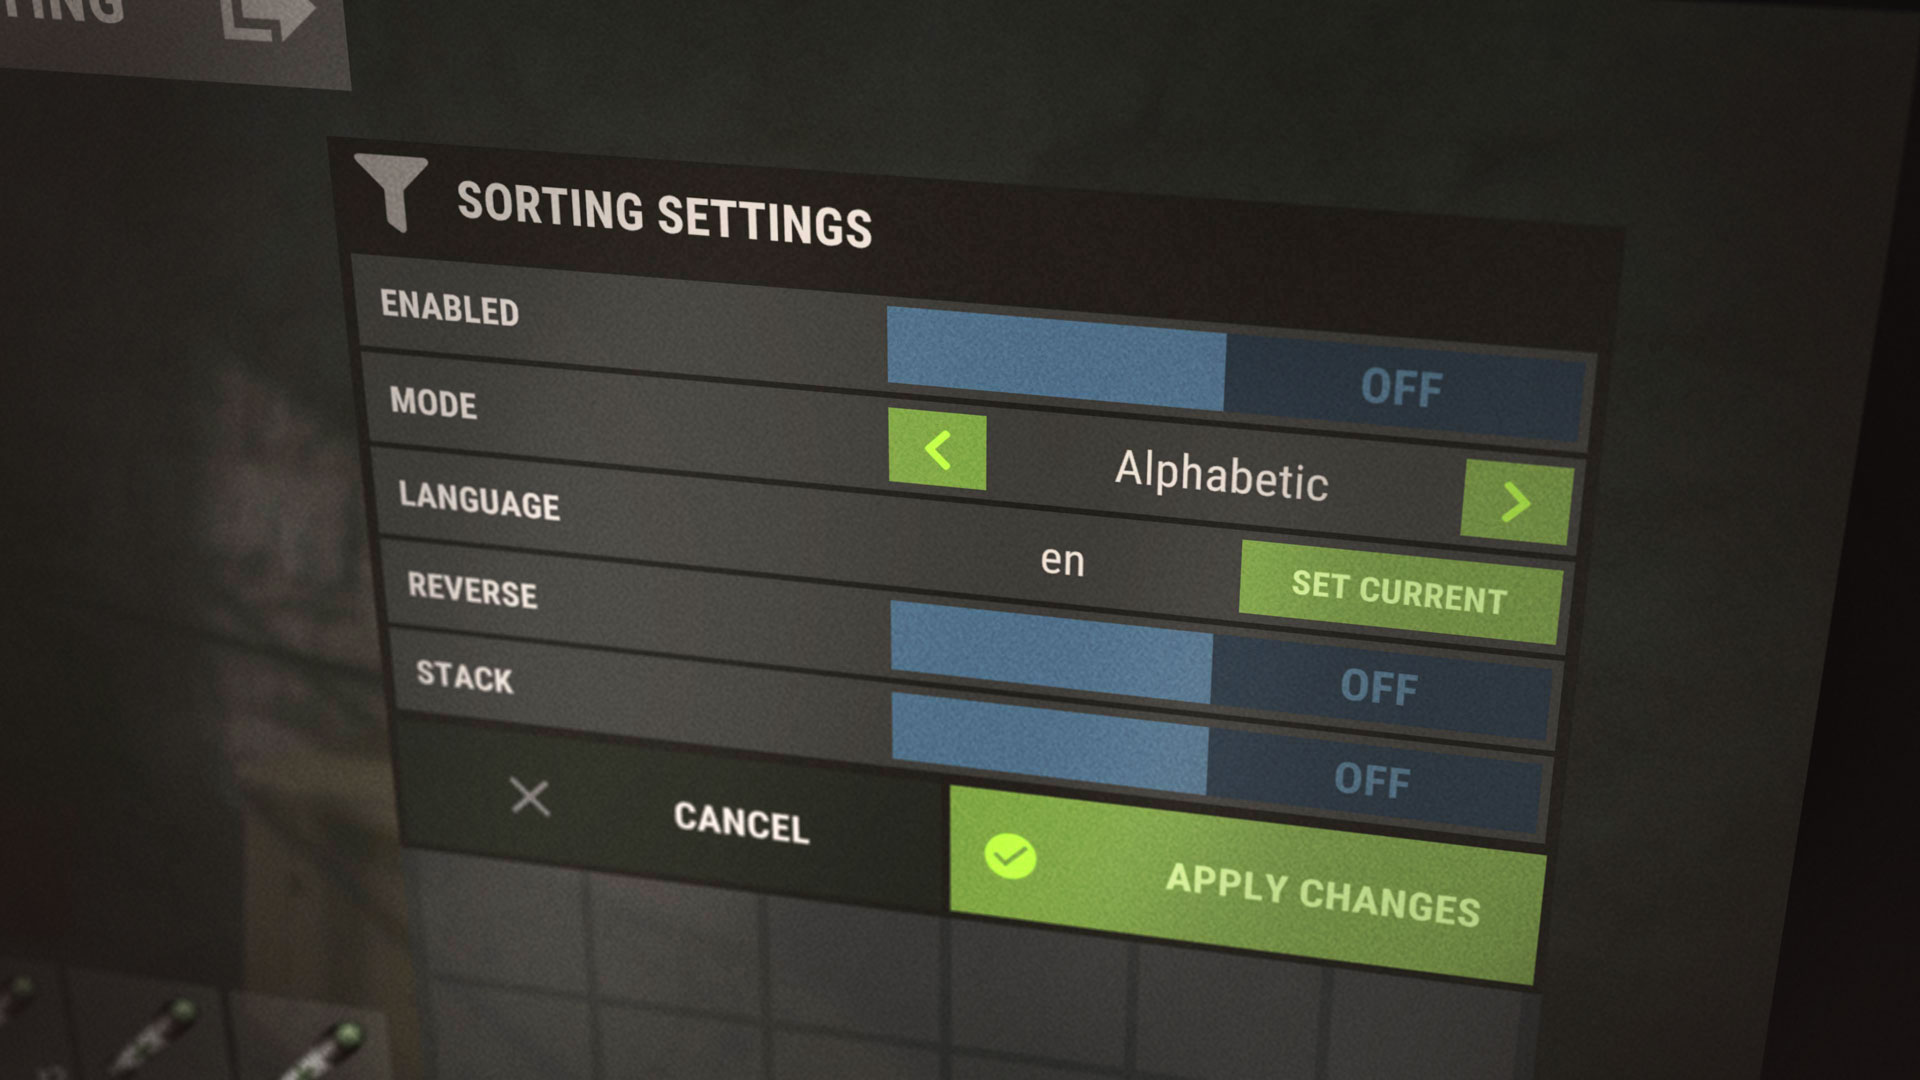
Box Sorting remembers the item layout in one box. Conveyors move items between boxes; the adaptor keeps the contents organised.
- Attach a Storage Adaptor to the box. Supply power for Box Sorting: 1 rW per sorting adaptor.
- Open the box and its sorting settings. Disable sorting while arranging your items.
- Place your items in the desired slots. Choose Custom and save a snapshot of this layout in the box settings.
- Enable sorting and apply the changes. Remove or add an item, then wait about a second: the game will try to restore the saved order.
The snapshot is created in Rust from the box contents. There is no photo to upload to the adaptor. This mode neither creates missing items nor fetches them from other boxes.
Other modes and power
Instead of Custom, you can sort by name, count, condition or category. Category is an easy starting point; Custom suits your usual equipment layout.
The adaptor receives electricity through Power In and passes the remainder through Passthrough. A chain of N sorting adaptors needs N rW at its input; count other consumers separately. The adaptor needs no power for regular industrial transfers.
Box Sorting adds to the power demand: the profile diagrams below cover conveyor transfers. Check the spare source and branch output capacity before powering adaptors.
Facepunch confirmed support for large and small wooden boxes, coffins and DLC storage. For other containers, check whether the settings are available in-game.
Sources: Facepunch · Box Sorting · Adaptor power · In-game settings window